


Mastering the Art of Drawing: Crafting a Chair with Precision and Flair | how to draw a chair
Drawing a chair entails building a straightforward but crucial piece of furniture. You will now refine the chair’s appearance, add legs and a backrest, outline its structure, and add shading for depth. This tutorial will help you accurately depict the fundamental shape of a chair in your drawing whether you’re a novice or an accomplished artist.
Gathering Your Drawing Materials
Gather the necessary supplies before you begin drawing a chair to make the process easier and more enjoyable. What you’ll need is as follows:
Paper: Select a sheet of drawing paper that is clear and smooth. Depending on your preferences, the size can vary, but standard letter-sized paper (8.5 x 11 inches) is a good place to start.
Pencils: You can make a variety of shades and lines by using a set of drawing pencils with various lead grades (such as 2H, HB, 2B, and 4B). For rough sketches, start with a harder pencil, then gradually switch to a softer one for shading.
Eraser: You’ll need an eraser to fix mistakes and improve your chair drawing. It’s best to use a kneaded eraser or a soft vinyl eraser.
Ruler: You can accurately maintain the chair’s proportions and draw straight lines by using a straightedge or ruler.
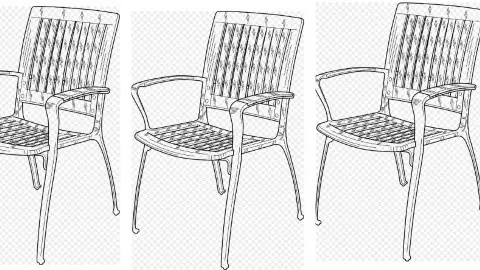
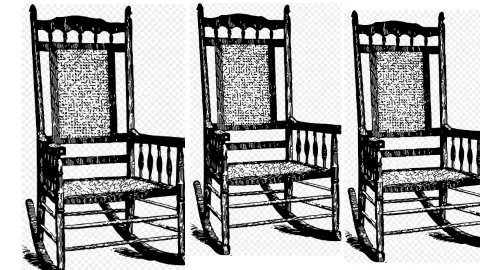
A clear reference image of the chair you want to draw should be located. This can be a picture, an illustration, or a chair from your immediate surroundings. By using a reference, you can be sure that your drawing accurately captures the chair’s actual features.
Workspace: Establish a cozy, well-lit workspace. Clear vision of shadows and details depends on good lighting.
Sketching the Basic Chair Frame
Start with the fundamental frame if you’re going to draw a chair. To outline the structure of the chair, lightly sketch simple geometric shapes using a harder pencil (such as 2H). Start by drawing lines for the legs, a rectangle for the seat, and a smaller rectangle for the backrest. Use a ruler to check that the lines are proportionate and straight. To accurately measure the chair’s dimensions, pay close attention to angles and measurements. This basic structure serves as the basis for your chair drawing, allowing you to add more specifics and enhance its shape as you work on it.
Adding the Seat and Backrest:
The seat and backrest should be added after the chair’s basic frame has been sketched. Outline the seat inside the drawn rectangle with a softer pencil (like an HB or 2B), making sure it lines up with the edges of the frame. Extend the smaller rectangle upward to serve as the backrest, keeping in mind the angle and height in relation to the seat. Pay close attention to the chair’s contours and curves because they differ between chair styles. Light shading that gradually adds depth and dimension to show how thick the seat and backrest are will improve realism. This action brings the shape of your chair closer to its finished appearance.
Detailing the Chair’s Legs and Support:
After the seat and backrest are in place, turn your attention to the chair’s legs and frame. Refine the leg lines you initially sketched by adding depth and volume with a darker pencil (like 4B). Pay close attention to the angles and curves on the chair because they determine whether it is a modern or traditional design. Subsequent to the seat, add crossbars or other support structures, making sure they realistically connect to the legs. These features enhance the chair’s overall aesthetic while also enhancing its stability. To make your chair drawing more realistic and visually appealing, think about using shadows and shading to highlight the three-dimensional elements.
Refining the Chair’s Shape and Proportions:
Concentrate on perfecting the chair’s overall shape and proportions now that the fundamental components are in place. Pay attention to curves, angles, and symmetry while using a variety of pencils to add depth and detail. Eliminate any stray or inconsistent lines to keep the chair’s structural integrity. To correct any errors, compare your drawing to the reference picture. Highlight the chair’s unique characteristics, whether they are elaborate carvings, slender modern lines, or classic accents. Continue to make adjustments until the chair closely resembles your reference and radiates harmony and balance. Your chair drawing will become a more accurate and polished representation after this step.
Adding Texture and Shading:
Use texture and shading to give your chair drawing more depth and realism. Use a variety of pencil grades, beginning with the lighter ones (2B, for example) for the initial shading. To locate areas with texture, such as upholstery patterns, wood grain, or metallic sheen, carefully examine your reference image. To replicate these textures, use hatching and cross-hatching techniques while adjusting the force and direction of your strokes.
Determine the location of the light source and adjust the shadows accordingly to create shading. Areas that would receive less light should gradually become darker to highlight the chair’s three-dimensional shape. To add a sense of volume and realism, pay close attention to the highlights, midtones, and shadows. Your chair drawing will be more convincing and visually appealing with careful texturing and shading.
Finalizing Your Chair Drawing:
Analyze the specifics, proportions, and general composition of your chair drawing as you draw it to a close. Refine any remaining flaws to create sharp lines, rounded curves, and accurate angles. Verify again that your chair maintains a unified aesthetic with the reference image.
If desired, take into account including background information or context, such as a setting for the room or supplementary items. This might improve the chair’s aesthetic impact.
Last but not least, subtly sign and date your artwork. Its completion and your ownership are indicated by your signature, whereas the date serves as a historical marker.
You produce a compelling work of art that displays your abilities and creativity by polishing your chair drawing with care and personalized touches.
Tips for Realistic Chair Drawings:
Study Anatomy: Examine actual chairs and reference pictures to comprehend chair anatomy. Pay close attention to the chair’s design, construction, and components.
Invest in high-quality drawing supplies, such as a variety of pencils, erasers, and paper. The quality of your drawing can be greatly influenced by the tools you use.
Start Off Lightly: To establish the chair’s fundamental shape and proportions, start off with simple, loose sketches. As you advance, adjustments will be simpler as a result.
Focus on recreating chair textures with various shading techniques, such as wood grain, fabric patterns, or metal shine.
Master Shading: To add depth and realism, comprehend the fundamentals of light and shadow. Investigate how light strikes objects, and try out various shading techniques.
Give it some time; patience is the key. Take breaks to objectively evaluate your work and gradually improve it.
Compare to References: To maintain accuracy in shape, proportions, and details, constantly refer back to your source image.
Practice: If you want to get better at drawing, you must practice regularly. Try out various chair designs and materials to diversify your options.

 और हेमंत कुमार (AIR 339) का भव्य स्वागत")

 Views Today : 190
 Views Yesterday : 410
 Views Last 7 days : 2984

